1. 下載取得 visual studio code
https://code.visualstudio.com/Download
code_1.52.1-1608136922_amd64.deb
2. 安裝
sudo apt install ./code_1.52.1-1608136922_amd64.deb
(依照實際取得的檔名安裝)
2020-12-25


2019-10-08
在Visual Studio Code (VS code) 使git版本控制的功能
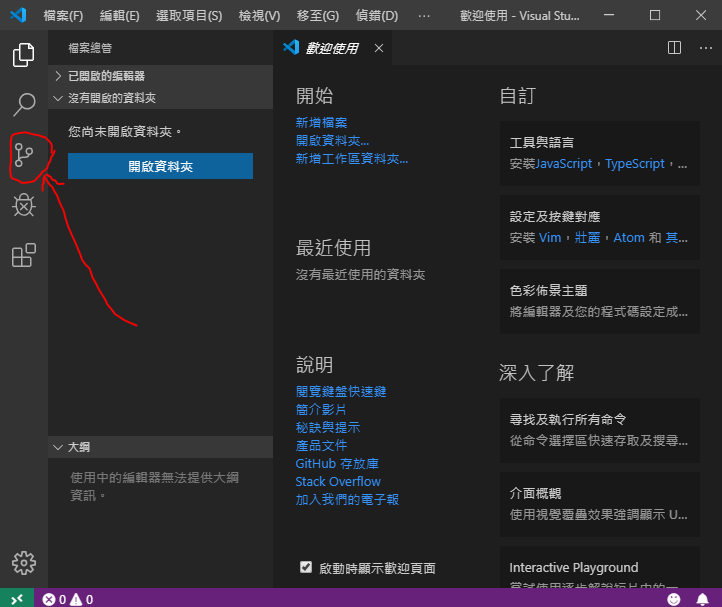
Visual Studio Code 提供使用GIT 進行程式碼版本管控的功能,但是要使用git前,必須先安裝git,GIT並沒有附加在 VS code的安裝中。
GIT的官方網站:https://git-scm.com/
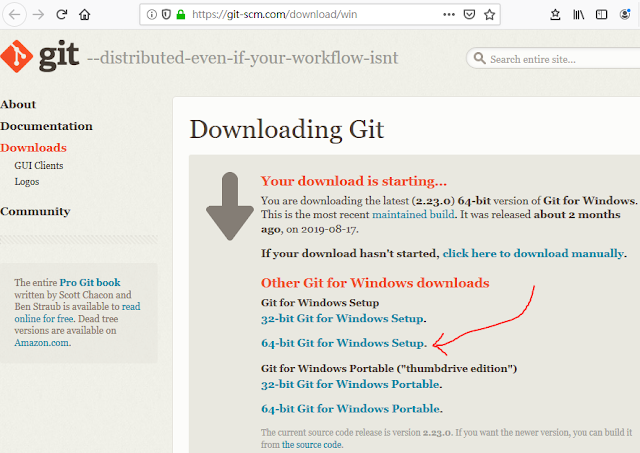
GIT的下載網址:https://git-scm.com/download/win
git提供多作業系統(Mac OS X, Windows, Linux/Unix)的安裝程式,目前大部分的電腦都已經是64位元的硬體架構,Windows系統,建議下載:64-bit Git for Windows setup
Git程式安裝後,搭配VS code使用時,可能多在文字介面下透過終端機操作,當然也可以在終端機下輸入git gui 或 gitk ...,開啟git提供的中圖形介面程式。如果需要進一步使用其他的圖形介面程式,可以參考(git GUI Clients):https://git-scm.com/downloads/guis
例如:SourceTree, GitHub Desktop, TortoiseGit, Git Extensions, GitKraken, SmartGit, Tower, GitUp, GitEye, gitg, ungit, git-cola, Cycligent Git Tool, giggle, Gitbox, Aurees, Fork, Working Copy, CodeReview, gmaster, Git2Go, GitAhead, Pocket Git, GitDrive, GitX-dev, GitBlade, Guitar, RepoZ, GitAtomic, Sublime Merge, SnailGit, GitFinder, Gitfox, NitroGit, GitFiend
git程式安裝說明:(下載取得 Git-2.23.0-64-bit.exe)
在VS code 中 使用 git :
安裝Extension : GitLens

利用GitLens 察看與前一版本的差異

使用GitLens 查看單行程式內容的變更歷程

GIT的官方網站:https://git-scm.com/
GIT的下載網址:https://git-scm.com/download/win
git提供多作業系統(Mac OS X, Windows, Linux/Unix)的安裝程式,目前大部分的電腦都已經是64位元的硬體架構,Windows系統,建議下載:64-bit Git for Windows setup

Git程式安裝後,搭配VS code使用時,可能多在文字介面下透過終端機操作,當然也可以在終端機下輸入git gui 或 gitk ...,開啟git提供的中圖形介面程式。如果需要進一步使用其他的圖形介面程式,可以參考(git GUI Clients):https://git-scm.com/downloads/guis
例如:SourceTree, GitHub Desktop, TortoiseGit, Git Extensions, GitKraken, SmartGit, Tower, GitUp, GitEye, gitg, ungit, git-cola, Cycligent Git Tool, giggle, Gitbox, Aurees, Fork, Working Copy, CodeReview, gmaster, Git2Go, GitAhead, Pocket Git, GitDrive, GitX-dev, GitBlade, Guitar, RepoZ, GitAtomic, Sublime Merge, SnailGit, GitFinder, Gitfox, NitroGit, GitFiend
git程式安裝說明:(下載取得 Git-2.23.0-64-bit.exe)
- GNU General Public License 授權訊息:

- 使用預設的安裝位置即可: C:\Program Files\Git

- 調整安裝選項:

- 可以選擇『開始』選單的目錄名稱:

- 選擇預設的編輯器:Use Visual Studio Code as Git's default editor


- 設定Path環境變數

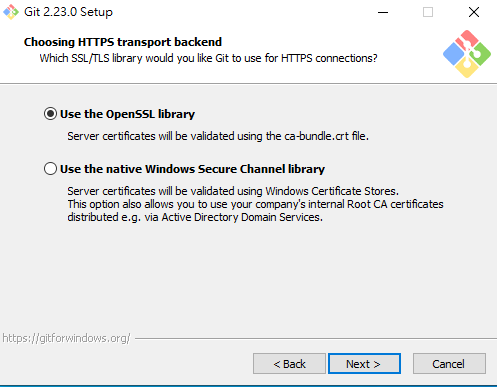
- 選擇HTTPS transport backend : Use the OpenSSL library
- 設定簽出(Checkout) 簽入(Commit) 行尾的格式

- 設定終端器模擬程式:MSYS2

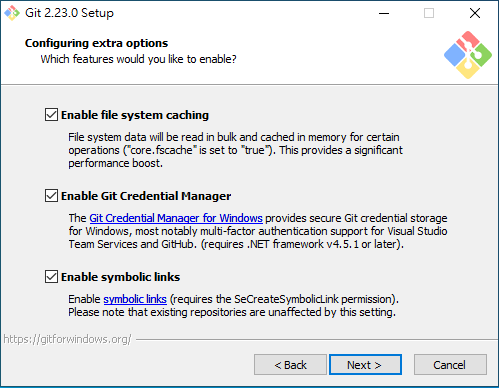
- 其他設定:Enable file system caching, Enable Git Credential Manager, Enable symbolic links
- 選擇是否啟用:Enable experimential option, built-in -i/-p
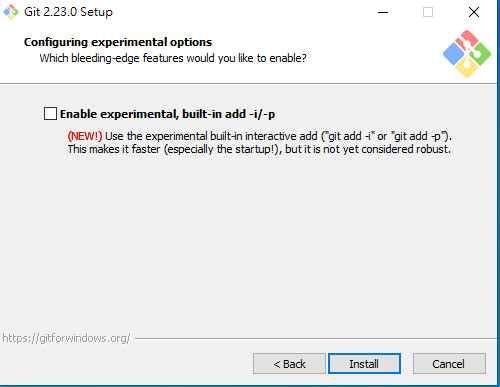
- 安裝完成

- 查看Path系統環境變數,確認已加入:C:\Program Files\Git\cmd
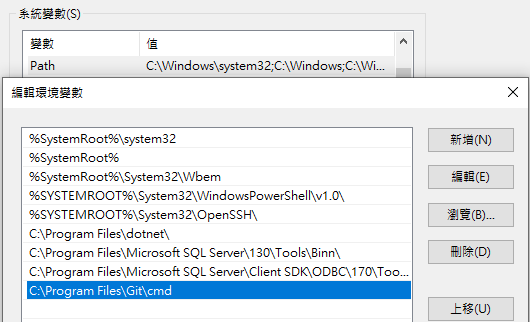
- 試RUN一下:git --help

在VS code 中 使用 git :
- 開啟一個工作資料夾:
檔案→開啟資料夾... :建立一個Test資料夾 - 檢視→終端機 (Ctrl + `)
- git init
repository(檔案儲存庫)初始化,完成後的訊息:
Initialized empty Git repository in C:/Users/user/Test/.git/ - git config --global user.email "abc@xxx.yyy.zzz"
git config --global user.name "Hannibal Huang"
建立全域變數:user.email, user.name - 在目前工作資料夾Test內,新增一個檔案test.txt,檔案內容:Test Line 0100
test.txt U : 以綠色字體出現,表示已取消追蹤,這裡更精確的說是還沒列入追蹤
原始檔控制鈕,顯示有1個暫止的變更

- git add test.txt
將檔案test.txt的內容,加入repository的索引
git status
顯示 git add test.txt 的執行結果
test.txt A : 檔案註記由U便A,表示以加入索引,但仍未簽入(Commit)

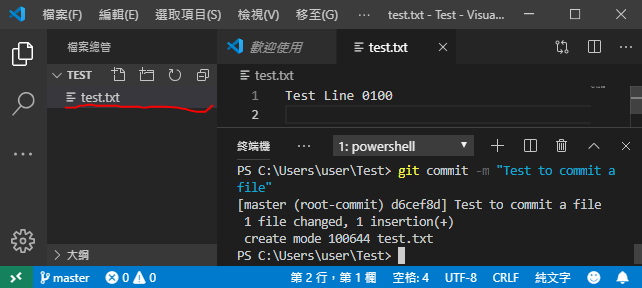
- git commit -m "Test to commit a file"
將目前repository(檔案資料庫)中,還沒簽入的部分,執行簽入(commit),建立一個版本
簽入後,test.txt變成白色,右端的A就不再顯示
- 第一行插入內容: Test Line 0010
第三行增加內容: Test Line 1000
存檔後:
test.txt M : 變成橘色,檔名末端註記M
原始檔控制顯示,目前這個Repository有一個暫止的變更

- git add test.txt
git commit -m "Test to commit a file(2)"
再次commit新增或修改的檔案前,要先add再commit

安裝Extension : GitLens

利用GitLens 察看與前一版本的差異
使用GitLens 查看單行程式內容的變更歷程
2019-10-03
Visual Studio Community 2019 增加繁體中文語言介面及中英文介面切換
這裡使用的Visual Studio Community 2019版本是Windows 10 Enterprise Evaluation的虛擬機器所預載的版本,跟win 10一樣都是英文介面。接下來說明如何切換中英文介面:
- 確認目前版本除了英文,是否已安裝繁體中文語言?
Tools -> Options ...

- 勾選:Show all settings
Environment -> International Settings,Language的選項:如果只有English,即使將Language選項切換為:Same as Microsoft Windows,仍然無法顯示繁體中文介面。

- 如何安裝Visual Studio Community 2019 繁體中文語言包?
以Administrator的身份,執行開啟Visual Studio Community 2019
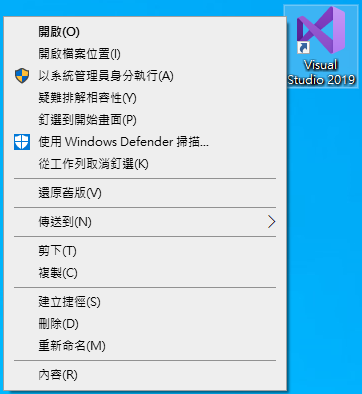
- Tools -> Get Tools and Features ...

- 選取:Language packs -> 勾選Chinese(Traditional)

- 下載、安裝
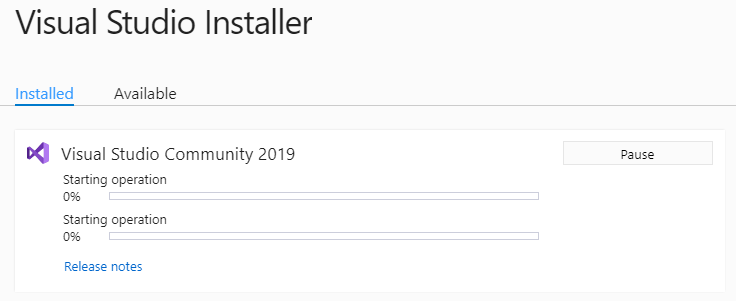
- 安裝後,重新開啟Visual Studio
Tools -> Options ... -> Environment -> International Settings -> 選取:中文(繁體)
再次重新開啟Visual Studio

- 確認:繁體中文介面OK


2019-08-24
VS Code : 用Visual Studio IntelliCode取代 Jedi 來當 IntelliSense engine
- 安裝 Visual Studio IntelliCode
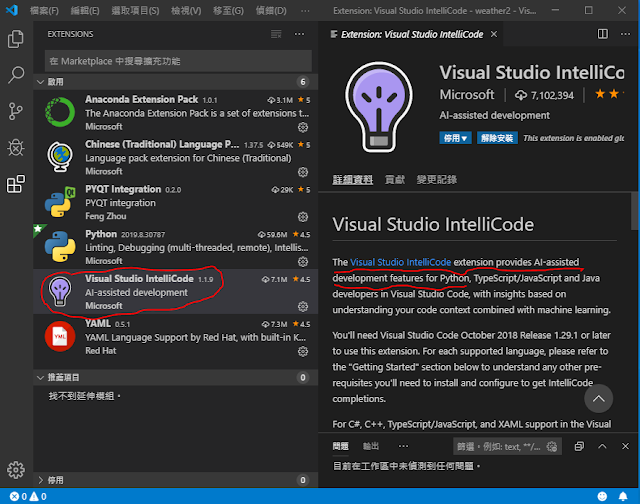
- 設定VS Code 的 IntelliSense Engine
搜尋方塊,輸入:Python Intelli
選取:Vsintellicode > Python : Completions Enabled
取消:Python : Jedi Enabled
根據提示訊息Reload language engine - 使用VS IntelliCode 當 IntelliSense Engine的妙用:
Jedi無法正常解析,類別內self所延伸的屬性、方法、控制項名稱,控制項所可使用屬性、方法...,但改用VS IntelliCode後,可以暢快地享受IntelliSense的大大好處。
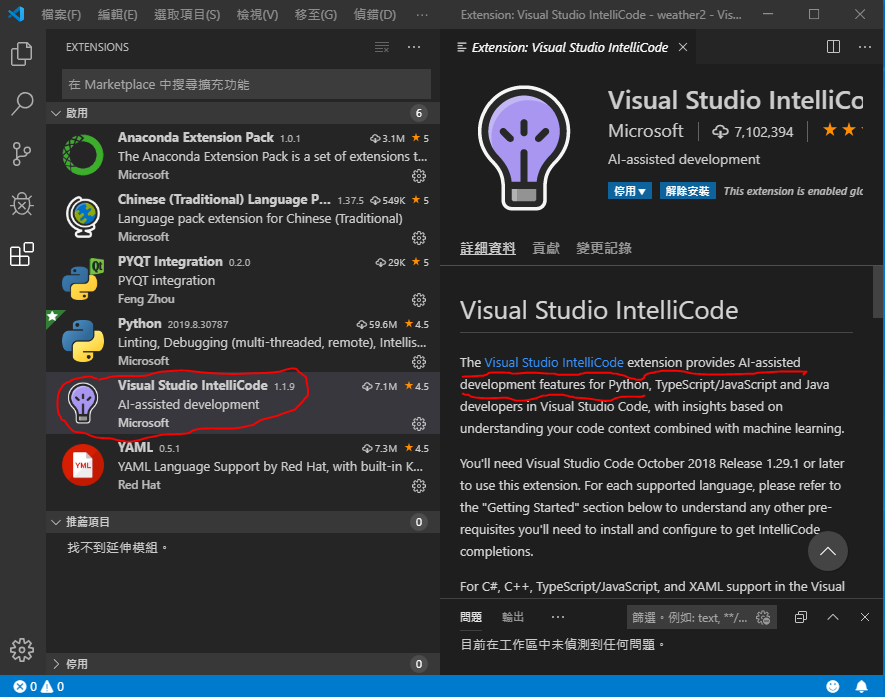


2019-08-23
VS Code : 讓pylint 除了錯誤(error)以外,排除顯示(disabled)不影響程式執行的警告(warning)、提示訊息(infomation)的訊息
Pylint的警告(warning)、提示訊息(infomation)等訊息,通常不會影響程式的正常執行,但通常會讓程式碼看起來很不舒服,這些訊息可能包含:

- Missing class docstring pylint(missing-docstring)
- Found indentation with tabs instead of spaces pylint(mixed-indentation)
- Variable name "e1" doesn't conform to snake_case naming style pylint(invalid-name)
- No space allowed after bracket pylint(bad-whitespace)
- Method could be a function pylint(no-self-use)
- Trailing whitespace pylint(trailing-whitespace)
- Constant name "win" doesn't conform to UPPER_CASE naming style pylint(invalid-name)
- ...

VS Code : pylint 出現錯誤訊息:No name 'QApplication' in module 'PyQt5.QtWidgets',解決方法
- 錯誤訊息:No name 'QApplication' in module 'PyQt5.QtWidgets'
- 訊息內容:
{
"resource": "/d:/MyWorkSpaces/VSWorks/ch04/qt04_lineEdit04.py",
"owner": "python",
"code": "no-name-in-module",
"severity": 8,
"message": "No name 'QApplication' in module 'PyQt5.QtWidgets'",
"source": "pylint",
"startLineNumber": 5,
"startColumn": 1,
"endLineNumber": 5,
"endColumn": 1
}
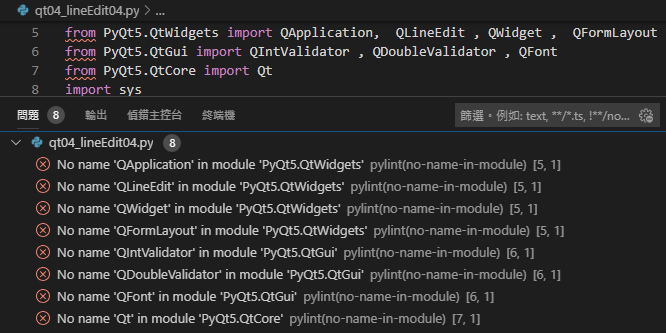
- 錯誤原因:
跟所使用的Pylint有關,所採用的版本預設不支援外部擴充模組(Extenions),PyQt5是C++所寫的外部擴充(Extension)。 - 解決方法:
- VS Code : 檔案→喜好設定→設定

- 在設定的搜尋方塊中輸入:python.linting.pylintArgs
新增項目,輸入:--extension-pkg-whitelist=PyQt5

- 設定資料會被寫入:setting.json

- No name 'QApplication' in module 'PyQt5.QtWidgets' 等模組錯誤的訊息消失了
from的下曲紅底線,不見了 ...



2019-08-17
讓在Anaconda Navigator環境下安裝執行的Visual Studio Code增加PYQT Integration的擴充功能
- 在Visual Studio Code安裝PYQT Integration的擴充功能

- 安裝PYQT Integration擴充功能後,將會增加下列功能,或更多,例如:
從VS code直接開啟 designer.exe 新增 ui form,在VS Code下預覽 ui form ...

PYQT: New Form Open designer PYQT: Edit In Designer Open designer with current ui form PYQT: Preview Preview current ui form PYQT: Compile Form Compile ui form to path defined in "pyqt-integration.pyuic.compile.filepath" PYQT: Compile Resource Compile qrc file to path defined in "pyqt-integration.pyrcc.compile.filepath" PYQT: Generate Translation File (.ts) Compile UI file (.py) to translation file with path defined in "pyqt-integration.pylupdate.compile.filepath"
Compile .pro filePYQT: Open With Qt Linguist Open with Qt Linguist for translation file (.ts) - 如果從 VS Code,無法正常啟動 designer.exe 或 pyuic5 ...,可以透過擴充延伸模組設定,指定正確的路徑、檔名 ...

- 以Qtdesigner這個設定項目為例,designer.exe,通常都是放在,Anaconda3安裝目錄的\Lib\site-packages\pyqt5_tools\路徑下。

- 設定項目的參考資料:
pyqt-integration.qtdesigner.path Path of executable file of qt designer, the extension will ask you to set at the first time it runs, e.g. c:\\Users\\username\\AppData\\Local\\Programs\\Python\\Python35\\Lib\\site-packages\\pyqt5-tools\\designer.exe pyqt-integration.pyuic.cmd "pyuic" command, default "pyuic5" pyqt-integration.pyuic.compile.filepath Compile file path, relative path as default, switch to absolute path by involving ${workspace}, e.g. ${workspace}\\UI\\Ui_${ui_name}.py pyqt-integration.pyuic.compile.addOptions Additional options for pyuic compiling, it can be a combination of '-x', '-d', '-i', etc. pyqt-integration.pyrcc.cmd "pyrcc" command, default "pyrcc5" pyqt-integration.pyrcc.compile.filepath Compile file path, relative path as default, switch to absolute path by involving ${workspace}, e.g. ${workspace}\\QRC\\${qrc_name}_rc.py pyqt-integration.pyrcc.compile.addOptions Additional options for pyrcc compiling, it can be a combination of '-root', '-threshold', '-compress', '-no-compress', etc. pyqt-integration.pylupdate.cmd "pylupdate" command, default "pylupdate5" pyqt-integration.pylupdate.compile.filepath Only works when compiling an UI file (.py), Stores the target '.ts' file's path, relative path as default, switch to absolute path by involving ${workspace}, e.g. ${workspace}\\TS\\${ts_name}.ts pyqt-integration.pylupdate.compile.addOptions Additional options for pylupdate, it can be a combination of '-verbose', '-noobsolete', '-tr-function', '-translate-function', etc. pyqt-integration.linguist.cmd "linguist" command, default "linguist"
讓在Anaconda Navigator環境下安裝的 Visual Studio Code (VS code),以繁體中文的介面顯示
安裝Visual Studio Code (VS Code) 繁體中文語言包(Chinese (Traditional) Language Pack for Visual Studio Code)的步驟:
- 點擊「Extensions」→在Extensions marketplace的搜尋方塊內輸入:chinese language pack,選取「Chinese (Traditional) Language Pack for Visual Studio Code」,可以查看VS Code 的中文(繁體)語言套件的說明擊使用方式。

- 點擊「Install」,安裝後會提示:重新開啟VS Code

- 重新啟動後,就會以繁體中文的語言界面顯示。如果沒有以中文顯示,可以參考以下的使用方式說明:
安裝了之後,在 locale.json 裡面設定 "locale": "zh-tw" 即可載入中文(繁體)的語言套件。要修改locale.json,可以按下Ctrl+Shift+P來呼叫 命令選擇區,輸入 "config" 以從其他可用命令裡面篩選出 Configure Language 命令。
2019-07-31
使用Anaconda Navigator安裝 Python的開發工具VS code
讓Anaconda Navigator來協助開發環境(environment)、模組(package)的管理,是一件愉快的事!
之前已經使用過Jupyter Noteboks、Thonny、Spyder ...等,總有一些功能不能盡如人意,試試VS code,感覺令人滿意。
之前已經使用過Jupyter Noteboks、Thonny、Spyder ...等,總有一些功能不能盡如人意,試試VS code,感覺令人滿意。
- AutoCompletion (IntelliSense ) / 自動補全 / 自動完成 / 輸入提示 ...,例如:
import sys
from PyQt5 import QtWidgets
oApp=QtWidgets.QApplication(sys.argv)
oWidget=QtWidgets.QWidget()
##以上Jupyter Noteboks、Thonny、Spyder 都還可以順利使用 AutoCompletion
oWidget.resize(300,100)
##上面這一行,輸入oWidget. 後,
##Jupyter Noteboks、Thonny、Spyder...
##通通無法帶出提示,知道有多少方法、屬性的選項,
##真的記不了那麼多啦...
##但是 VS code 可以辦到...

- Code Folding / 程式碼折疊
習慣了使用NotePad++的程式碼摺疊功能後,沒有這個功能可以用,會忽然手足無措,尤其是在面對Python用「縮排」的作法取代其他程式語言用 { } 來表示函式、控制敘述...的執行範圍,沒有明顯的 end of def / if / for/ while ... 的標示,程式的辨識很容易混淆,又開始懷念 notepad++ 了 ...
Notepad++ 的 Code Folding / 程式碼折疊

Notepad++ 的 Code Folding / 程式碼折疊


- Anaconda Navigator → Home,可以查看那些基於Anaconda的應用程式已經安裝?有哪些準備Ready的程式可以安裝?

- 安裝完成後,「Install」鈕,變成「Launch」鈕,按下Launch就可以開始用了...


訂閱:
文章 (Atom)